ResIOT Pushover Tutorial
Usage
ResIOT allow you to set up your own Pushover Application customizable through Advanced Scenes. Users can use Pushover Applications by sending them messages.
You may get notified while a certain event raises or for a real example, when a Node is triggered. In this tutorial we are going to create our custom Pushover Application through a few steps.
*This guide requires a Pushover account which the Pushover Application will send messages to
1. Get Pushover User Token
Go to pushover.net and log in your account. Once you are logged in you can see the section "Your User Key" in the top right, we are going to use the content of the first text box later.

2. Create and Get Pushover Application Token
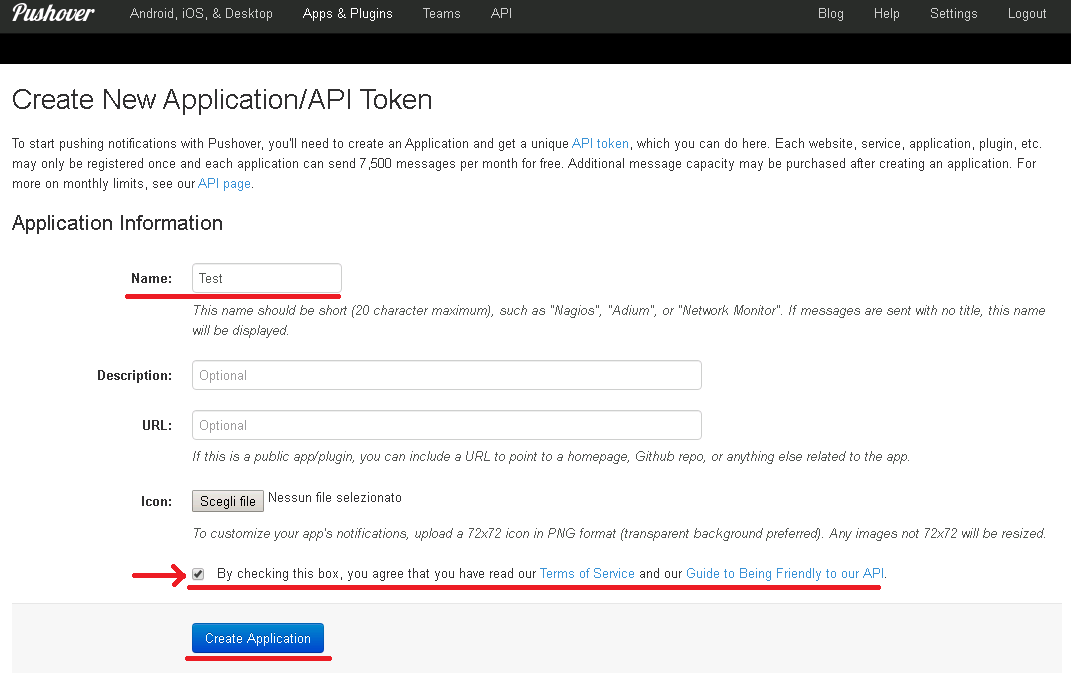
Now you need to create a Pushover Application: in your Pushover homepage scroll down and you will see the section "Your Applications", click on "Create an Application/API Token". Now you only need to insert a Name for your Application, but you can also customize the other fields as you wish. Then click on the checkbox to agree with the Pushover Terms of Service and click on the Create Application button.

Now you will see your Application page, in the section "API Token/Key" you will find the text box containing your Application Token. We are going to use this token in the next step.

3. Create Pushover object on ResIOT
Now that you have your User Token and Application Token navigate to the Settings/Notification: Config Pushover field in ResIOT and click on New.

Compile the Name field with the name you wish, compile the User Token and Application Token fields with your data and then click on Create.

4. Advanced Scenes and Pushover
Your Pushover configuration now is ready to use, all you need to know is its HexID retrievable from the Settings/Notification: Config Pushover field.

Here's an example of a Script Lua 5.1 Scene.
Example:
Script Lua 5.1 Scenes:
    Message = "Test Message"
    PushoverHexID = "6d65643332"
    Err = resiot_pushover(Message, PushoverHexID)
    if Err ~= "" then
      resiot_debug(Err)
    end