Map Widget
Usage
This widget allows you to create, in the dashboard, a map containing the position and some information of nodes and gateways.
Type of Maps
List
ResIOT supports two types of maps:
- OpenStreetMap:
OpenStreetMap is the default option, it is free and no registration is required on third-party sites for its correct operation;
- Google Maps:
This type of map uses Google's APIs to work, so a token is required that is given to individual google accounts.
To obtain the key necessary for its operation, follow the first step of this guide
LINK.
How to change type of Map
To change the map type from OpenStreetMap to Google Map and vice versa, you first need to be the administrators of your organization,
and then go to your organization settings that are in the "Settings" menu under "Organization Settings".
Once in this page, look for the "Maps Type" field and change it according to the type of map you want.
If you select the "Google Maps Api" option, a new field called "Google Maps Api Key" will appear in which you will have to paste the
key you received following the previous guide, and then click the "Save" button.
Fields Description
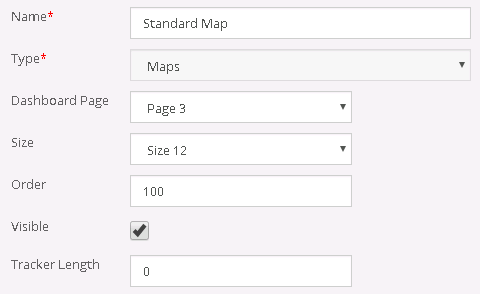
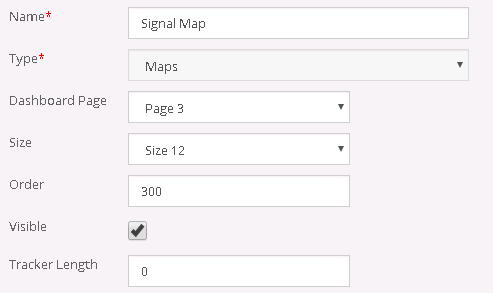
- Name
The name field contains the name that the user wants to give to the map. This field holds a string and can have up to 255 characters.
- Type
The Type field indicates the type of widget you are going to create, in this case it will always have selected "Maps" and will always be disabled.
- Dashboard Page

This field contains the page number in which you want the widget to be created.
If you want to create your widget in a new page, it must first be created inside the Dasboard.
- Size
The Size field asks how long your widget should be.
It starts from a minimum of "Size 3", which is equivalent to a quarter of the page, until you get to "Size 12" which is the whole page.
- Order
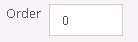
The Order field allows you to place your widget wherever you want among other widgets.
This is a numeric field, and the lower the number, the more the widget will be above the page.
- Visible

The Visible checkbox allows you to hide the widget when you do not want it to be shown.
- Tracker Length
![]()
If one or more nodes are selected in the Widget Elements with the option "Tracker Location" then the history of
the movements of that node will be shown on the map.
The node's tail will be as long as the number put in this field.
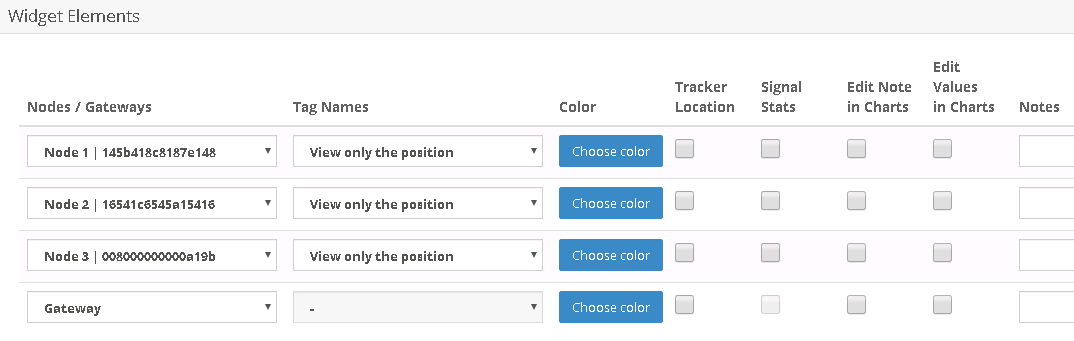
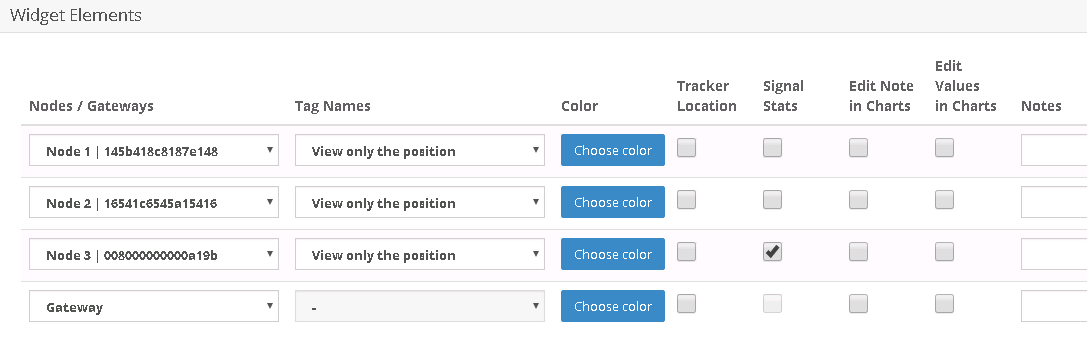
- Widget Elements
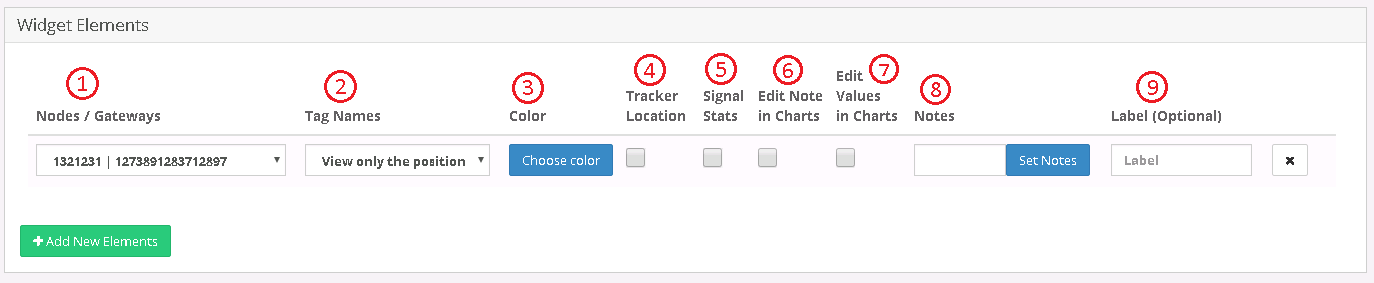
For each device there are nine fields that can be modified, each of which has different effects:
1) Nodes/Gateways:
In this field you can choose which node or gateway will be shown on the map.
2) Tag Names:
This field is active only if a node has been inserted in the previous field, otherwise it is disabled.
If a node is selected, then this field is filled with 2 possible values, possible node tags and a field called "View only the position".
The only difference between the two options is that if you select a node's tag, you can see it in the node information on the map.
3) Color:
The Color field decides the color of the lines and arrows that will be written if the "Tracker Location" and "Signal Stats" fields are selected.
4) Tracker Location:
A normal check that decides whether to show the history of sensor movements on the map using lines.
The length of the history is given by the "Tracker Length" field of which we have discussed previously.
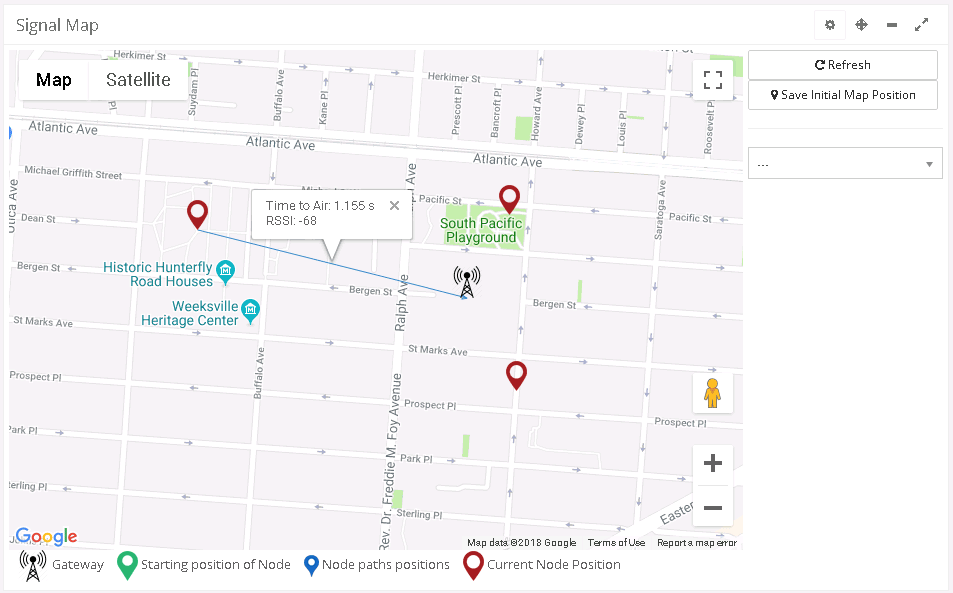
5) Signal Stats:
This check allows to show on the map the value of the quality of the signal of a senosre respect to the gateways with
which it has communicated and that are present in the same map.
Remember, however, that the lines representing these signals will be visible only after the first sending of a message by the sensor.
6) Edit Note in Chart:
This is a field that will allow you to edit the notes inserted in a line and to edit them directly from the map.
7) Edit Value in Chart:
This check will allow you to change the value of a tag selected in the "Tag Names" field directly from the map.
8) Notes:
A personal field that can be filled as best you can.
9) Label:
Also this is a field in which you can put a custom string, this field will then be shown along with the sensor data on the map.
Examples Link
Standard Map
- Configuration
- Preview

Tracker Map
- Configuration
- Preview
Signal Map
- Configuration
- Preview