Laird Sentrius™ RG1xx Gateway Configuration
ResIOT connection data
First of all, you need to access to your ResIOT account and open the "new gateway wizard" or the "new gateway configuration page". By clicking on the Sentrius™ icon and then clicking on the next button, you should be able to see the following window.
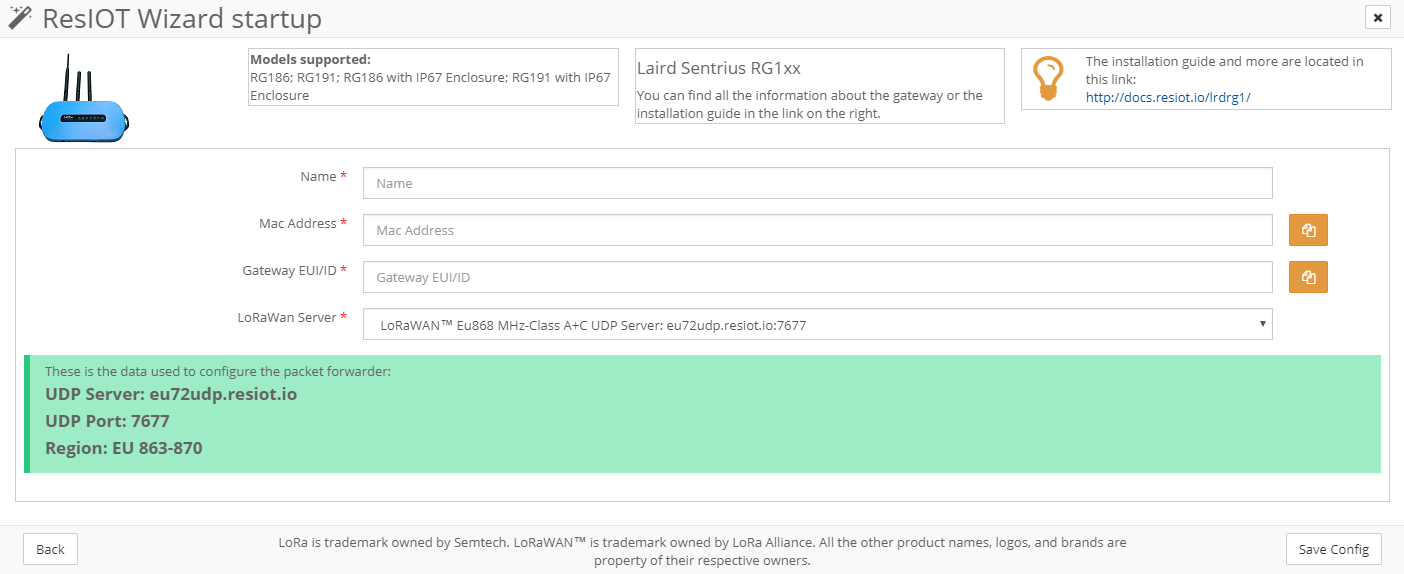
This window allows you to enter the Gateway main data (to enable connection) and also it shows you, into a green box, the connection data required by the gateway. At this point, keep this page open and follow the next steps.
Gateway Setup
To connect yor Sentrius™ Gateway to our Server you need first to prepare it using its embedded functions. When you unpack your device, you have to connect it to the power supply and to your network via Ethernet connection (the power supply cable and the Ethernet cable are included).
Now you have to find the Sentrius gateway IP on your network. Remember that this gateway is preconfigured in DHCP mode. You can access to your gateway (also via browser) using the default values which are:
- Username: sentrius
- Password: RG1xx
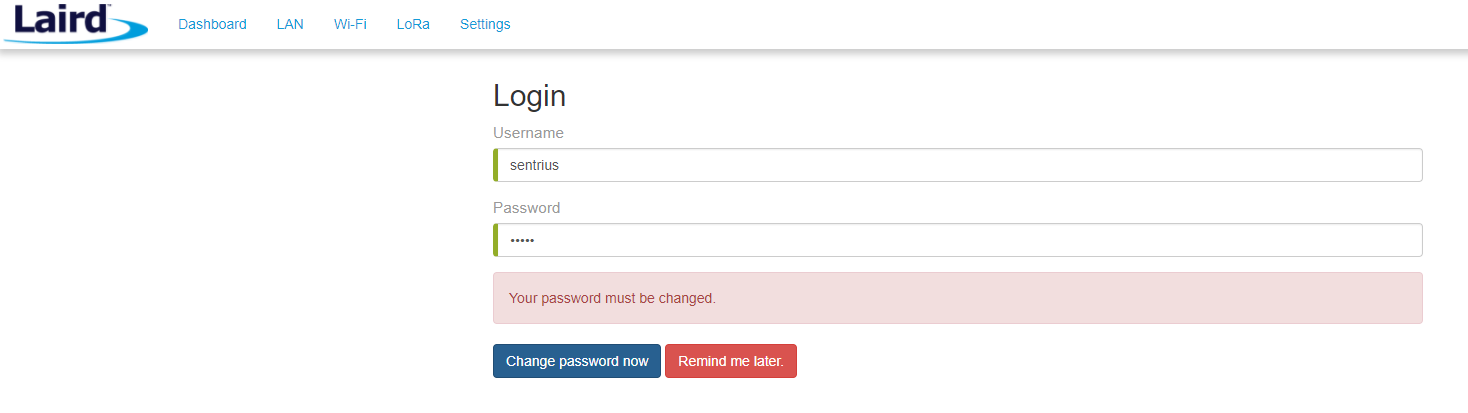
At your first access, the gateway suggests you to change your current password. You can change it now or later into the settings panel.
LoRa setup
Into the menu bar of the dashboard view, usually at the top of the page, there is the "LoRa" settings menu. Click on it. Now, on the left side of your screen, press on "Forwarder". In the new window, select the "Packet Forwarder" option from the mode box.
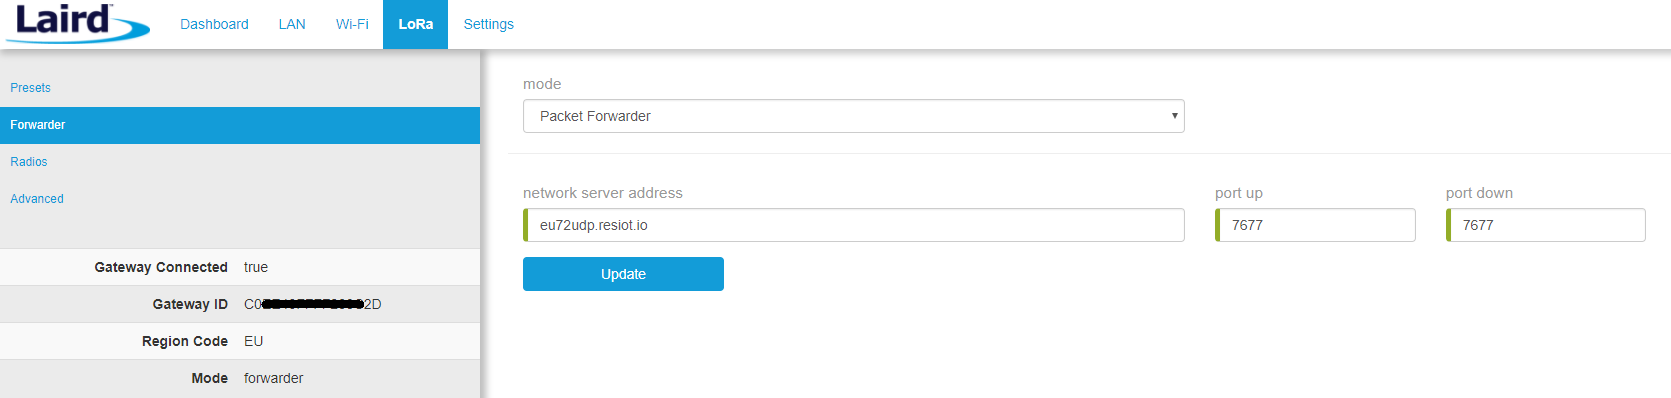
The next data should be entered following the green box instructions into the "new gateway" page of your ResIOT account that you let open few steps ago. In this example case we do:
- Network server address: eu72udp.resiot.io
- port up: 7677
- port down:7677
At this point, click on the update button to confirm the data.
ResIOT connection
In the current window (still into the gateway LoRa configuration), on the left side there is your Gateway ID. You have to copy and past this id into the Gateway EUI/ID field of your New Gateway page in your ResIOT panel. Complete the Name field with the name of your device and complete the MAC Address field with the data on the bottom side of your gateway.
Confirm your new gateway with the Save Config button and now you are ready to use your device.
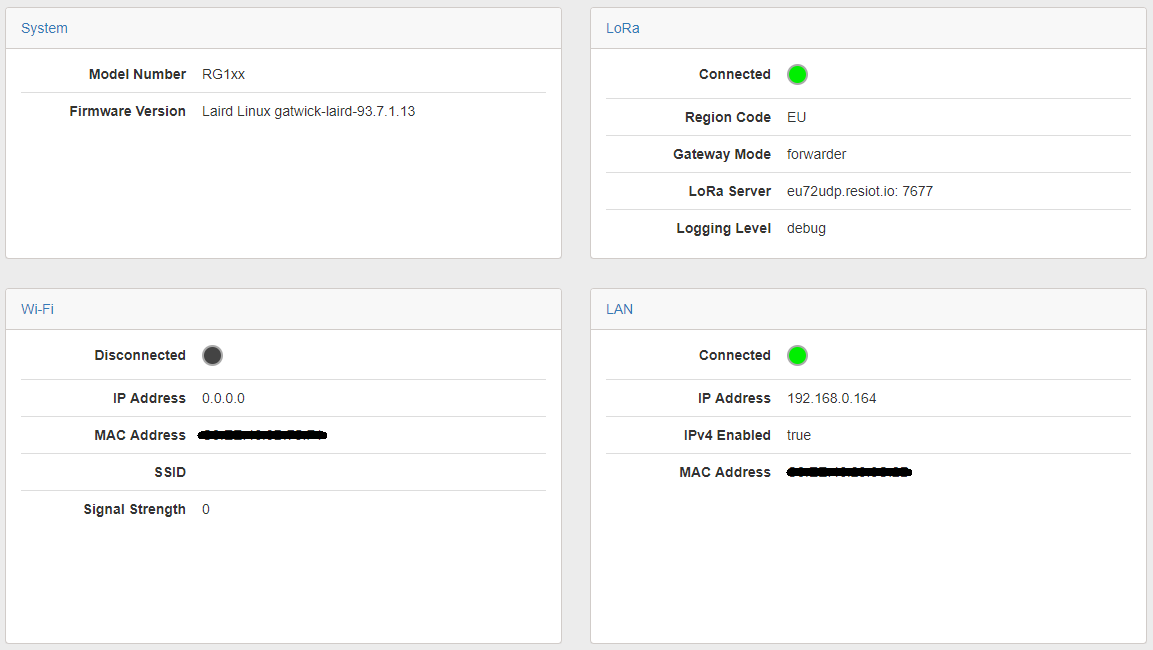
To be sure that all the steps have been done properly, you should see gw_alive messages on your ResIOT log and you should see green button near the LoRa label of the dashboard of your gateway configuration page. Theese pictures are two examples of a correct configuration